Monthly Archives: January 2011

My favorite frosting… (at least today)

Over the weekend I made a batch of vanilla cupcakes. I know I’ve been a crazy baking kick lately. But these were for a friend who’s been going through a rough patch and that also brings me to a blog announcement: I’m taking a bit of a break from baking. I’m still going to experiment with some great whole wheat bread recipes, but no more sweets. At least until my waist line can better handle it. So, I will still post recipes (of course!), but no desserts for a while. Anyway…back to the cupcakes!

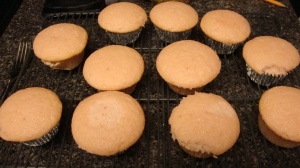
I must confess, I totally cheated with the cake part of these cupcakes. I bought a box of store mix, but they were amazing! I’ve made an important cupcake-baking discovery though: most people, myself included until this batch, over bake cupcakes. They still taste good, but they tend to crumble and fall apart. But on Saturday when I was baking these, I thought I would see what I could do to remedy the situation. My pink lemonade cupcakes were yummy, but such a mess because they crumbled too easily. So I took these vanilla babies out a minute or two early. It was genius, if I do say so myself. They were so delicious. So, for cupcake fanatics- take note!

Because I was such a baking cheat with the boxed mixed, I felt as though I should at least make a new kind of frosting! For those of you who have read my “recipe blogs” page, you’ll know I love the website delish.com. I also get ocassional emails from culinary masters in the Delish kitchen with new suggestions. Well this week, I got an email about Valentine’s Day sweets. They have 12 brilliant beyond brilliant desserts for your special someone. It’s enough to make me think about moving my “no-sweets” rule back a few weeks……NO! I must persist! Well for those of you who don’t need to lose weight and want to see the ideas, go here. As I was perusing these yummy treats, I found this recipe for light cream cheese frosting. What could be better than that? The answer: nothing.

This frosting is absolutely delicious, ridiculously easy to make (only two ingredients!) and calls for LIGHT cream cheese. I’m in frosting heaven. The only downside is that it makes a tinie tiny amount. Basically, in order to frost like 18 cupcakes I needed 8 ounces of light cream cheese and roughly 2.5 cups of powdered sugar. But boy was it worth it.


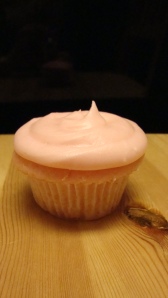
I also used my new favorite piping trick (a plastic baggie with a tip cut off) to swirl around the frosting. I just think they look more elegant. Don’t you agree?


Here is my finished product (the tray is for my friend). And with that….my farewell to sweets…..at least for a while…..

Leave a comment

Filed under Dessert, New Recipes

Chocolate Cookie Sandwiches with Buttercream Filling

This dessert is insane. It is so rich and decadent, I could barely finish one cookie- and I have a sweet tooth the size of New York City. I found this recipe the other day when I was doodling along online: http://gazingin.com/2011/01/25/chocolate-buttercream-cookie-sandwiches/

I started by mixing together the sugar and butter in a bowl until it was nice and fluffy. I then added an egg and mixed again.


Then I whisked together the dry ingredients and then added the dry ingredients to the butter mix slowly. It sort of looks grainy and isn’t super smooth, but don’t worry, it will work.


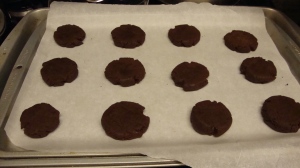
Next, I took a tablespoon and measured out dough. I then rolled out the dough into little balls and placed them on the tray. I then found the largest cup I could find and flattened the balls. Next time, I think I would use a 1/2 tablespoon instead, because the big cookies are just so freaking rich!


Then I baked the cookies for about ten minutes at 375. Make sure you take the cookies out while they still look a little shiny/ wet. They continue to harden. Let them cool for a few minutes on the sheet, then transfer to a wire cooling rack.


Once the cookies were cool, I mixed together the frosting. My powdered sugar was sort of spazzing out, so I kind of eye balled it. Next time, I would add a little more powdered sugar. Once the frosting settles, the butter flavor definitely comes out, so I think more sugar would help the balance. Also, it looks like there isn’t a lot of frosting, but trust me, it goes a long way.


I put a dollop of frosting on one cookie and then used the other to squish the frosting out. They are delicious, especially with a big glass of milk!

2 Comments

Filed under Dessert, New Recipes

Pasta with sausage, fresh tomatoes, basil and Parmesan

I found this recipe while browsing some of my favorite cooking websites. It was so insanely easy and unbelievably delicious! Here is the recipe: http://find.myrecipes.com/recipes/recipefinder.dyn?action=displayRecipe&recipe_id=10000001918479

Last night as I was thinking about dinner, I had some time on my hands before picking up my bf from class (I was working from home due to the snow). So I decided to get everything prepared. Usually I get things ready, but I took my ocd to a whole new level.

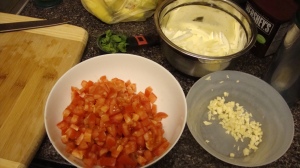
As you can see, I chopped everything, then placed the things in bowls. I used a different bowl for each step in the recipe. Then I covered them with plastic wrap to make sure Winston didn’t help himself while I was away. I know you are thinking “what cat would try and eat onions, garlic or tomatoes?” But you’d be surprised, the other day I caught him eating plastic wrap and then corn….so go figure.


When I got home, I put some water on the stove and boiled the pasta. Then I heated up some olive oil in a skillet and added the onions and the meat from 3 sweet Italian sausage. Make sure you remove the casings!


After about 5 minutes, I added the garlic and cooked for two more minutes. I stirred occasionally and broke up the sausage as it cooked.


Then I mixed in the tomatoes and cooked for another two minutes.


I then reduced the heat to low and added the pasta, two tablespoons of cheese, basil and some salt and pepper.


After I mixed everything together (slowly! my skillet was about to overflow), I spooned the pasta into two bowls and sprinkled more cheese on top!

Yummy yummy yummy! I even went back for seconds, which I almost never do!

1 Comment

Filed under New Recipes, Pasta, grains, etc.

New format….

As many of you may have noticed, I have a new format to my blog! I was bored and wanted to switch things up a little. What do you think?

Although I’m currently loving it, the new format does have a down side. It has definitely screwed up the spacing on some of my old posts. The pictures and text are all wonky! I’m doing my best to remedy that, but I have to do it one post at a time and…..(this is a big secret)…..I’m nearing my 100th post!

So please be patient with me as I sort through the rubble and keep coming back!

Leave a comment

Filed under Uncategorized

Pink Lemonade Cupcakes

I wanted to try a new dessert this weekend and I found this one while browsing around foodpress.com. Here is the recipe: http://daylicious.wordpress.com/2010/12/01/pink-lemonade-cupcakes/

While I altered a few things, the cupcakes are delicious! They are a fantastic alternative to really super sweet, over the top cupcakes. Don’t get me wrong, I love chocolate and sugar overloads as much as the next self-respecting female or chef, but every so often I love my sour, tart or fruity dessert as well. Plus they are so cute and pink!

First, I started by mixing together the cake mix, the egg whites, the lemonade concentrate, the water, the vegetable oil and the food coloring. Depending on how bright pink you want your cupcakes to be you can add 4-6 drops of food coloring. I personally liked the soft baby pink color, so I went with 4 drops. Then I measured 1/4 cup of batter into each muffin tin and baked at 350 for 20 minutes.


The recipe suggested I spray the liners and the tin with cooking spray and I ignored this step. I probably shouldn’t have, because I had a little trouble getting some of the cupcakes out.


While the cupcakes were baking, I made the frosting. The recipe called for 4 cups of powdered sugar and 1/4 cup lemonade concentrate, along with some softened butter and food coloring. Well I put in four cups of powdered sugar, but needed at least a cup of concentrate to make the frosting actually mixable. I’m not sure how that happened.

Winston is quite curious as to what this lumpy pink thing is...


Then, using a large freezer bag, I piped the frosting onto the cupcakes.


Isn’t it gorgeous!


I don’t say this very often, but I was darn proud of this creation. I feel like you could buy these for $4.00 at a fancy bakery! I think they would be amazing for a birthday party or a baby shower, or even for an Easter/Valentine’s treat!

1 Comment

Filed under Dessert, New Recipes

Best Chocolate Chip Cookies

Every cook and baker should have one dish that they can make successfully any time, any where, regardless of tools, environment and altitude. For me, my go-to dessert is this recipe. It is by far the best chocolate chip cookie I’ve ever had. Almost anyone I’ve given them to would agree. The other day I tried to post it on another blog and realized, to my horror, I hadn’t written about it here. I was shocked. These cookies are such an integral part of who I am as a cook, I guess I just assumed I had discussed them in the very beginning of my blog experience. But, oh well, I am remedying the situation now.

The recipe was originally called “Jane’s Chocolate Chip Cookies” out of an ancient California Fresh cookbook which looks like it was first printed in the Dark Ages. In actuality, it has just been loved like no other cookbook in my mom’s house. Although it pains me a little to give away all of my secrets, I’ve decided to give out my recipe:

1 1/3 cup softened butter

1 cup white sugar

1 cup brown sugar

2 teaspoons vanilla

2 eggs

3 cups flour

1 teaspoon salt

1 teaspoon baking soda

24 ounces chocolate chips

1 cup finely chopping walnuts

Here’s how it’s done: Preheat the oven to 375 degrees.


Then, cream together the sugars and the butter.


Next, add eggs and mix. Add vanilla and mix again.


Then, add flour, salt, baking powder and mix. At this point, clean off the beaters (enjoy the dough if you’d like, it’s amazing!). Then, add the chocolate chips and the walnuts and mix with a spoon or spatula rather than the hand mixer. The dough gets seriously thick! I didn’t add walnuts this time because I ran out, and they are delicious either way, although they hold their shape better with walnuts.


As you can see, this dough is not for someone who likes only one or two chocolate chips in their cookies. But let’s be honest, who chooses a chocolate chip cookie if you don’t like chocolate?


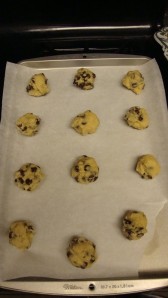
Then I put little balls of dough on a parchment-lined pan. One of the keys to having thick and round cookies is to take the extra second and round the dough into little balls with your hands. Yes, it’s messy, but sooooo worth it. Make sure you leave lots of space in between the balls because they really spread out.


I then cook the cookies for 8-10 minutes depending on how big the dough balls are. Make sure you take the cookies out before you think they are done. You want the edges to be a little golden brown but the tops to still be shiny.

I let the cookies cool on the pan for about two minutes, then I move them to a cooling rack. As you can see, these flattened out a lot because there weren’t any walnuts, but they were amazing anyway. Eat them hot, cold, or my personal favorite: with milk! Yummy yummy yummy!

Leave a comment

Filed under Dessert, Oldies and Goodies

Kitchen space and organization

Some of you may remember that the number one item on my wish list is a bigger kitchen. Well, that really can’t be crossed off until I move and that’s not going to happen until this summer…but until then, I’ve found and acquired a few things that have made a world of diffference.

I’m short. Very short. Especially without shoes. So the cabinet above the fridge was wasted space for me. I can’t put anything I use regularly up there or I have to live with a stepping stool in front of the fridge permanently. And what good is a fridge if it’s blocked by a stool? So for the past few months, bf has used it as his bar- stashing glassware and alcohol up there that only he uses and can reach.


Just before Christmas, however, one of my family friends gave me this little…chest? cabinet? armoire? I don’t know what you’d call it, but I’m thrilled to have it! Hand-me down furniture is awesome. I literally jumped/hopped/wiggled with excitement.


Right now it stores some drink-related odds and ends in the drawer, and then, as you can see, glassware on top and bottles on the bottom.


Can't you tell he's thinking "what mom? the doors are open- I'm supposed to explore"


It’s absolutely the perfect size for our bar-related stuff, and Winston loves it too.


He's right about to attack the camera in this picture....but I had to show you the mouse!


In fact, he favorite part is the bottom. He loves, to no end, to stash his little mouse underneath it and then watch us use a spatula to get it out (my arm doesn’t fit). Quite the spectacle, I must say.


But I have big plans for this baby (the cabinet). I want to find (which has been no easy process since the measurements are tricky) or make a shelf that goes across only the right side of the bar. Then I can have glassware on top and below the shelf and bottles to the left. Eventually, I’d also like to find a little wall-mounted wine rack that could go above the, let’s stick with cabinet, so only liquor is inside. Oh and for the record, I know I’m crazy about my Winston, but I’m actually crazy about all animals, not just cats. I’ve been known to share my Thanksgiving dinner with a stray cat I then rescued, talk to squirrels, and bury birds who have died by flying into windows. I know this doesn’t make me sound normal, but to me a crazy animal person sounds better than a crazy cat lady, right?

You may be wondering what sort of style my apartment is from this piece of furniture. I’m not usually one to favor flowers painted on the front of wooden pieces. However, due to a recent blog finding that I’m absolutely obsessed with (younghouselove.com), I’m on a bit of a do-it-yourself kick. For years I’ve planned to sand down and stain my light pine dinning set. I’d love to do the same to this piece as well. So once the weather gets a bit warmer and staining outside won’t result in my fingers being permanently stained blue, keep an eye out for a before and after picture!

Anyway, back to the kitchen aspect of this post- after all this blog does concern food or food related items. With the glassware and bottles gone, I can now store items up in the cabinet that I only use once in a blue moon (my knife sharpener, blender, some extra jars that I’ve saved from pasta sauce, an immersion blender, etc.). As a result, what we like to call the “gadget cabinet” is now so much pretty, accesible and results in much less blender falling on my toes- induced swearing.

Second project: Our pan, pot, lid, skillet cabinet. It is a mess. Partly because we have too many pans (bf- if you are reading, I will deny this statement and there is no such thing as too many pans). Perhaps I should clarify. I think each pan has it’s purpose and all are used regularly. However, they really shouldn’t all be stashed in one tiny cabinet with a 1/3 shelf that doesn’t really serve much purpose. So we found a shelf from the Container Store that fits great.

Ok, I admit, still slightly chaotic, but sooooo much better than it was.


As you can see we’ve put our lids and a few small sauce pans on the top shelf, all sorts of skillets on the new shelf, and then the large pots, a huge new skillet (Christmas present, yay!) and my pancake pan on the bottom. Does it look great or what?


Third, and final, project: The pantry. I know everything that is in there, except for some of the extras in the very back of the top shelf. But as I already mentioned, my height limitations make it very difficult to ever see the back of the shelf. Blame my mom. She gave me the height, or lack there of. But anyway, for anyone else that plans to venture into the center section of the pantry, I would fully expect them to close the doors quickly in fear that an assortment of grains, pastas and cans would be able to cascade onto the floor. Part of the problem is that there are about 1,001 bags of different kinds of rice, couscous, barley, quinoa (did you know there are such things as black and red quinoa?), and risotto. I like having options, so I have a lot of grains in stock.


For some of the smaller bags, I was able to use some recycled pasta jars. With the help of some sticky labels, these crazy bags quickly began to shape up.


Aren't they wonderful! Is it weird I'm so excited about jars?


But for some of the larger bags, a small jar wasn’t cutting it. What to do? I didn’t like the idea of buying a bunch of new storage containers, cause let’s be honest, I’m on a budget and new storage containers can really be a slippery slope. Well, yesterday I dropped some stuff of at Goodwill and decided to take a peak inside, just for kicks. I found these two awesome antique-looking mason jars for $1.96 a pop. That’s right, one dollar and ninety six cents. I couldn’t beat that if I tried. If they had had more than two, they would have been mine too. A quick soak and wash once I got home, and they are now the proud holders of risotto and quinoa!

Yay for organization! Do you guys have any good kitchen storage ideas? Please share!

1 Comment

Filed under Gadgets and Things, Life Stuff, Weekly Winston

Stuffed shells with marinara sauce

In my search for new recipes, I looked no farther than one of my favorite cooking blogs: thissweekfordinner.com. Here is the recipe: http://thisweekfordinner.com/2010/09/07/my-new-fave-go-to-meal-stuffed-shells/

It’s very easy and doesn’t require that many ingredients. It also makes a ton so it feeds at least four or two with leftovers for lunch!

I started by mixing the filler: one egg, a 15 ounce container of skim ricotta, some pepper and salt, some dried basil, and some crushed garlic. I think I may saute the garlic in the future before adding it to the mix, but I’m not sure.


While I was putting together the stuffing, I also boiled the shells. I then dried the shells by dabbing them with a paper towel. I then took a spoon and filled the shells until they were almost full. Then, I spread them out  evenly throughout the pan.


I then put some sauce on top and sprinkled some Parmesan and Mozzarella. I then baked for 25 minutes at 350.


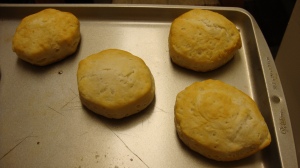
Oh, I also baked some of those can biscuits while boiling the pasta and preparing the stuffing. I forgot to take a picture when they first came out of the oven, but these puppies don’t last long around here.


Anyway, I baked for 25 minutes until the sauce was bubbly and the cheese was nice and melty.


Then I served the shells with some salad and the biscuits. A nutritious and yummy dinner!

Leave a comment

Filed under Uncategorized

Kitchen Gadgets

I have never been much a snob about kitchen gadgets or the materials I use when cooking. I don’t buy the fanciest olive oil, I don’t order spices from a special store, and I don’t buy the highest quality chocolate. Part of the reason I don’t do these things is that I’m on a young professional’s budget. There is no denying that fancy chocolate adds up. Furthermore, unless I am making a really rare, once-a-year type cake, the oober-high quality ingredients taste different enough to warrant the hike in prices. At least for me. Maybe you feel differently.

However (yes there is a however), there are a few things where I will make an important exception. Much like fashion and furniture, I am willing to open my wallet for amazing cookware. This rule is a new one. One of my lovely friends gave me two Le Creuset baking dishes for Christmas. The first is a 4×4 dish perfect for appetizers or souffles. The second was featured in my bread pudding post. They are both shiny jet black on the outside and a beautiful stone color on the inside. They are super dense and HEAVY! I am officially a believer. These things cook like….well it’s their job. While Le Creuset does cost quite a few pennies, when the pennies are available for use, boy is it worth it. I will have to be satisfied with just the two for now, but I can assure you any future kitchen wish lists will include a major appearance by Le Creuset.

Like perhaps this beauty… http://www.chefsresource.com/lecreus834qt.html

Totally expensive? Yes. Could find a similar product for 1/5 the price? Yes. Do I love it anyway? Yes.

While this next exception isn’t exactly cookware, it is a total life saver. Behold the oven thermometer. “Why do you need an oven thermometer? Don’t you set the heat on the oven?” you may ask. I asked the same questions (altough I did so silently in my head as my mom was the one advocating for this tool). But when one of these lovely contraptions showed up in my stocking, I could find no reason not to give it a shot.

To be honest, I wasn’t expecting much. I have a relatively new oven and although things did seem to cook fast, typically I was able to prevent burning and under-cooking. My first test was during my bread pudding experiment. The recipe called for the oven to be set at 325. Imagine my surprise when I turned on the oven light and the thermometer read 350 degrees! I turned down the controls to 300, hoping for 325 upon my next visit. This time the thermometer read 330.

If you are interested, you can buy one here: http://www.target.com/Oven-Grill-Thermometer-2-5-Dial/dp/B001G9B7O2/ref=br_1_19?ie=UTF8&id=Oven%20Grill%20Thermometer%202%205%20Dial&node=13003671&searchSize=30&searchView=list&searchPage=1&sr=1-19&qid=1294763092&rh=&searchBinNameList=target_com_category-bin%2Cprice%2Ctarget_com_brand-bin%2Cmaterial_type%2Ctarget_com_primary_color-bin&searchRank=reviewrank&frombrowse=1

I took a few lessons from this experience. First, my oven is 30 degrees too hot (kind of a big deal considering baking is such a precise art). Second, kitchen thermometers are not to be underestimated. Third, when my mom pushes a kitchen gadget, and not too subtley I might add…I need to get on board ASAP.

Leave a comment

Filed under Gadgets and Things, Uncategorized

Bread Pudding with Chocolate

I’ve only ever had bread pudding in England. While I absolutely love it there, somehow when I cross the Atlantic ocean, my ingrained prejudice against it rears it’s ugly head. Why is that? Why do Americans seem to think bread pudding is gross? When I proposed making it, my bf said “I’m not the biggest bread pudding fan, but I’ll try it”. Whatever the reason, this dish will change those perceptions. I promise.

I came across this recipe on one of my favorite blogs and since I am woefully in need of recipes, as I mentioned yesterday, I thought I would give it a shot. It’s wonderfully easy and you need very few special ingredients. Also, as desserts go, it’s not so awful. I used skim milk which always helps. Here is the recipe: http://thisweekfordinner.com/2011/01/05/bread-pudding-experiment/

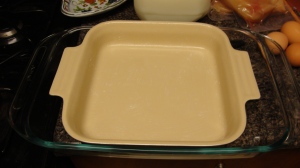
First, I got my pans ready. I buttered the 8 x 8 dish. I then put a towel on the inside of the large glass pyrex and put the smaller dish inside the pyrex, on top of the towel. At this point, I also started my tea kettle going to heat up some water. I’m going to talk more about this dish later, but isn’t my new Le Creuset baking dish gorgeous?

Then I chopped up the bread and some semi-sweet baking chocolate I had left over from my chocolate-filled Russian tea cakes. You could also use raisins or put fresh fruit on top of it when it’s done baking. When cutting up the bread, first I sliced the load into roughly 1 inch slices. Then I cut off the bottom of the slice and cubed the rest. You want about one layer of bread and then just sprinkle the top with chocolate. You won’t need a full loaf of bread.

Then I made the custard stuff. First I mixed together the eggs, sugar, cinnamon, salt, and vanilla. I added a little extra cinnamon because I love it. I mixed it with a hand mixer. Then I added the melted butter and the milk and stirred it together. Next, I poured the liquid over the bread and chocolate. Using my fingers, I pushed down the bread into the liquid until all of the pieces with soaked. Then I put both pans in the oven. Then, I pulled out the shelf in the oven so that I could pour hot water into the pyrex. You want to make sure the water comes up about half way of the 8×8 pan. It’s really important that the water is there so that the custard sets. I must confess, this step gave me a little trouble. Originally, I had the edges of the towel hanging outside of the large pyrex. However, once I added the water, the towel essentially served as a funnel, allowing the water to drip over the sides. So, I had to lift up the 8×8 dish and tuck the corners of the towel into the large pyrex, then return the small dish.

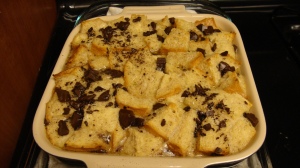
I baked the pudding for 65 minutes at 325. Depending on your pudding it could take a few minutes less or more. You want the custard in the center to be set, but there can still be a little of liquid. I used a fork and moved a piece of bread and was able to see the custard. We let it cool for a few minutes then ate it hot with whipped cream. It’s also great cold. Thank you so much to Jane for the recipe idea! I loved it!

Oh, and my bf is now a bread pudding fan.

4 Comments

Filed under Dessert, New Recipes